A subtle yet visually appealing feature. Having icons next to your items, can add a layer of professionalism to a page. If you’re an Elementor and WordPress aficionado using the JetEngine Listing Dynamic Repeater Widget, this guide is tailored for you. Whether you want to maintain consistency with a singular icon or diversify with unique ones, read on…
There are a couple of ways you might want to use this…
The same Icon for all items:

Or a different Icon for each:

Note: For predefined lists of items, you typically wouldn’t require a Repeater Field. So, if you’re only choosing from a set list, you may not need to go down this route.
1. Using the Same Icon for Every Item:
For a unified look, you might want the same icon next to each item. Here’s how to achieve that:
Inside the “Item format” field, input the following:
<i class="fas fa-check"></i> %vehicle%- Replace “check” with whatever icon you want to show. Grab the name from Font-Awesome website.
- Swap out
%vehicle%with your Repeater Field Name.
2. Using Different Icons for Each Item:
If you’re looking to give each item its unique flair, follow these steps:
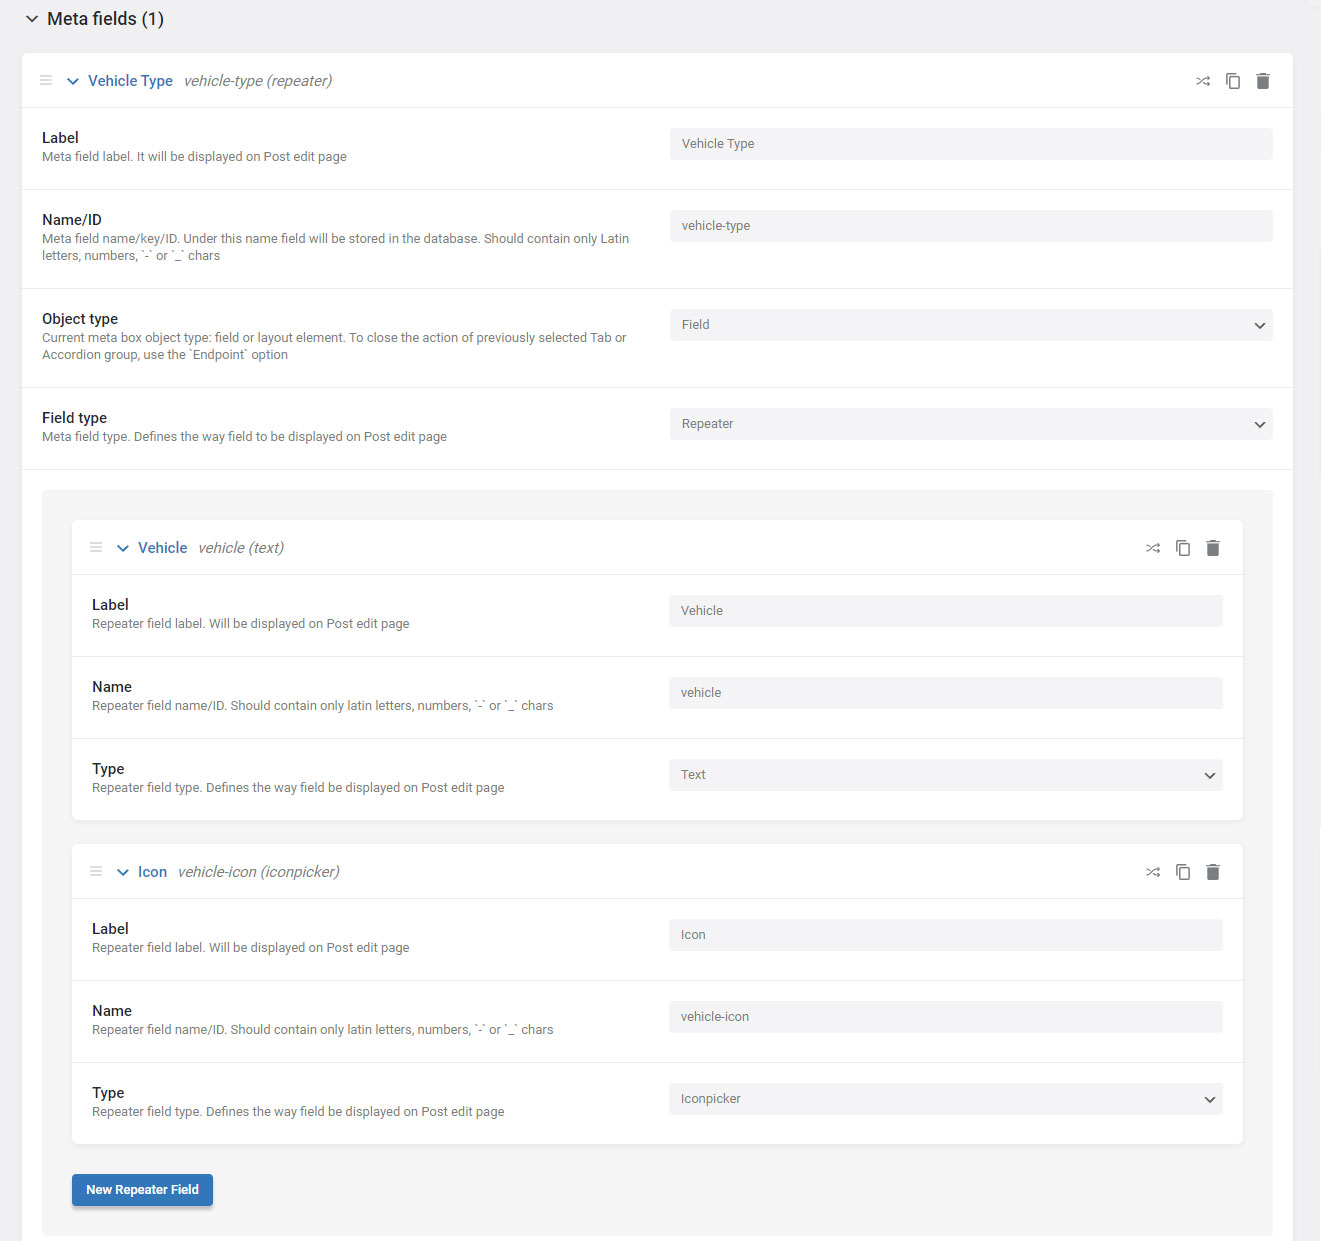
First, in your JetEngine Custom Post Type or Meta Boxes settings, ensure that you include an additional Repeater Field for the “Iconpicker” type.
example:
And then Inside the “Item format” field, input the following:
<i class="fas %vehicle-icon%"></i> %vehicle%- Replace “vehicle-icon” with your IconPicker Repeater Field Name.
- Replace %vehicle% with your Repeater Field Name
Bonus Tip – Customizing Icon Color:
To give your icons a splash of color, integrate some inline CSS. For instance, if you’re aiming for a fiery red:
<i style="color:red" class="fas %vehicle-icon%"></i> %vehicle%Conclusion:
Distinguishing your JetEngine listings with icons is a cinch, and the result is well worth the effort. It not only adds visual appeal but also helps visitors navigate your site more efficiently. With these steps, you’re well on your way to creating an enhanced user experience. Keep experimenting, and as always, stay creative!